Friday, November 2, 2012

Manicure of the Week and Nail Polish Review

My manicure for this week is quite simple because I can finally start growing my nails I thought I would do a coloured french manicure, so instead of doing a whole lot of tutorial photos I thought I would review the nail polishes that I have used in this manicure.
Coloured French with reverse ring finger.
I applied my regular base coat, OPI Nail Envy Nail Strengthener for Sensitive and Peeling Nails (it's the one with the orange writing). This base coat works well for me, I don't have sensitive or peeling nails so I can't judge it on its ability to help with that but it helps to prevent staining on my nails. I do still get slight staining when I wear green and blue polishes, so I recommend trying two layers of base coat if you are using blue or green polish.

Next I applied two coats of OPI Pink Flamenco to all my nails except my ring fingers. This colour applies nicely to my nails and is opaque in two coats. It is also very shiny, even without a topcoat, but I always apply a topcoat so I get as much wear as possible.

Next I applied three coats of Revlon Orange Pop, which is scented when dry. Like all Revlon polishes that I have tried this colour needs three coats to be opaque. It is less shiny than the OPI polish but this doesn't matter because I put a topcoat on top. At first I thought the scented when dry idea was a silly gimmick because you can't smell it after you have put top coat on, but I find it useful. I know that when I can smell the orange then the polish is dry and ready for another coat.

I then free hand painted french tips on all my nails with the opposite colour. I did two coats of the Revlon Orange Pop and one coat of the OPI Pink Flamenco.

Once it was all dry I applied Nailene Acrylic Strong topcoat. This gives a nice shine and helps prolong the wear of my polish. But I do find that I can get bubbles in my nails when I use this topcoat.

Overall I like this combination of polishes and it usually lasts at least a week on my nails, although I do find that when my nails are longer the polishes tend to crack after a few days because my nails have more flexibility than the polish. I try to prevent this by adding a layer of topcoat every couple of days.

Thursday, November 1, 2012

Monday, October 29, 2012

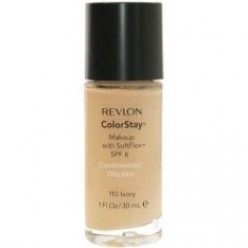
Revlon Colorstay Foundation Review


Pros                                                                       Cons
Great coverage                                                      Smells like paint
Great colour range
Long lasting
Lightweight
No breakouts
Revlon Colorstay
How it works for me
I apply this onto moisturised skin using a stippling brush or foundation brush. I tend to start applying the foundation on my problem areas (for me, my chin), then work a thin layer onto the rest of the face and neck. I then go back and add another layer to any areas that need extra coverage.

For day to day wear I use Revlon Colorstay foundation without a concealer and I find it gives me enough coverage and I am not concious of my blemishes.  I will however use concealer for a night out or when I know photos will be taken.

I set the foundation with a loose powder and for me it lasts all day. I do not use a primer everyday, only when I know I will be wearing my make-up longer than usual or when my skin is overly oily as in the summer.

The coverage can be built up to a full coverage by layering or can be left as a medium coverage. For such a high coverage foundation it feels lightweight on the skin.

I have never had any issues with Revlon Colorstay Foundation causing me breakouts. I feel as though it reduces the oil on my skin, but whether this is because it absorbs the oil or reduces oil flow I do not know.

This foundation has an SPF of 6, which isn't very high but I use this with an SPF moisturiser so this isn't a problem for me.

The only con I find is the smell. When wet the foundation smells like paint which at first was off putting but once the product has set on the skin there is no scent.

I use the colour 110 Ivory for combination/oily skin.

I highly recommend that you try this product.

It is around $40 in New Zealand. In my mind well worth the price.

Please feel free to ask questions and I will answer as best I can.

View before and after photos here.

Thursday, October 25, 2012

Garnier Miracle Skin Perfector All in One B.B. Cream Review

All opinions are my own and what works or doesn't work for me, may still work for you. If you don't want to read my full review, please skim down to the overview.

Product
50 ml of product
Lasts 12 months once open
Price - On sale now for $14.86 from The Warehouse

Claims
"Garnier BB cream for immediately perfected skin with even tone and boosted glow. Blurs imperfections and smoothes fine lines. SPF15 protection and 24hr hydration."

First Impression
This product has a very strong smell, it is quite a nice smell but overpowering.
The packaging is simple and easy to use, the product is thick so doesn't run out of the tube but comes out smoothly when squeezed.
The colour looks quite dark on my hand but blends away quite sheer. On my hand it gives a light coverage with a definite orange look. It appears glowy but not greasy.

Thoughts
I first applied this to my face with my fingers, it gave little to no coverage. I let the product settle and then applied another layer in an attempt to build up coverage, it did not work. I have also tried applying the B.B. Cream with a brush which did give slightly more coverage but still a light coverage.
The colour is far too dark for my skin and there is no lighter option. I set the B.B. Cream with a lighter powder to counteract the orange.
I do not feel that it immediately perfects skin at all, the redness in my cheeks looked the same as before. It did nothing to "blur" my blemishes. Unless you have excellent skin you would need to use a concealer with this product.
As for the claim of 24 hour moisture, it is very moisturising, I don't know if it gives 24 hours of moisture because I moisturise morning and night.
This product did give my skin a glow but not in a good way. My face was left glowing with an oily shine. Even after applying a a powder, my skin still looked oily.
I wore this B.B. Cream for a few days then it started to break me out, I stopped using it and let my skin recover. I then tried it again to make sure it was this product that broke me out and again after using the B.B. Cream for a few days I broke out.

Overview
I have combination/oily skin with an oily skin and I generally only get breakouts on my chin. This product gave very little coverage, which can be forgiven because it is not claiming to be a foundation. Its strong smell can also be forgiven as it is not unpleasant to me. But because it leaves me looking shiny, orange and feeling greasy as well as breaking me out all over my face, I will definitely not be repurchasing this product let alone finishing the tube.
This product may work on other skin types, especially those with dry skin and people who are not prone to breakouts. I did like the way it worked on my hands which have normal skin. I feel this B.B. Cream is not suited for people with my oily/combination skin type.

Garnier does now have a B.B. Cream specifically made for oily/combination skin that is said to be non comedogenic but sadly this is not available in New Zealand. Hopefully it will be released here soon.

Sorry for the negative review but this is just my opinion of the product with my skin, it may work wonders for you.

Sunday, October 21, 2012

Easy Temporary Tattoo Nail Art

Hello internet people!

I love doing nail art and I recently lost my nail art guinea pig to overseas travel, so I have been suffering a little bit of nail art withdrawal. I have been spending a lot of time watching nail art videos on YouTube.

I struggle to do nice nail art on my self because it is near impossible to get both hands looking the same quality. As I mentioned in a previous post, I am definitely not ambidextrous. I stumble upon the temporary tattoo technique whilst watching YouTube videos, it basically involves painting your nails, sticking a tattoo on top then sealing with a top coat. Great for getting both hands to look good.

Here are some pictures showing how I did my temporary tattoo nail art.
Start with freshly manicured nails.
I filed my nails, gently pushed back my cuticles and applied cuticle oil.
Make sure you remove the cuticle oil by washing your hands before applying polish.

Always apply a base coat to prevent staining your nails.
I used OPI Nail Envy.

You need to apply a base colour of your choice.
I chose OPI Fly and applied two coats.
Make sure the colour is completely dry before starting with the tattoos.

These are the tattoos I used. They cost $1.

I cut shapes out of the tattoos that I wanted on my nails.
I applied it by placing the tattoo on to my nail then pressing a damp cotton pad on top for 10 seconds.

Thumb with star tattoo applied.

Finished nails with two coats of Nailene Acrylic Strong Top Coat.
I hope you enjoyed my nail art, you can recreate this in your favourite colour and with any tattoos you can find. Remember you can also cut up the tattoos like I did if they are too big for your nails.

Thanks for stopping by. :)

Saturday, October 20, 2012

Quick, Easy, Everyday Eye Make Up

Here is how I do my eyes most days. Occassionaly I will apply a gold shadow to the lid.
Start with a clean eye.

Fill in your brows if you need to.
I have used a Za eyebrow pencil.

Apply a shimmery skin tone shadow to the entire eyelid up to the brow.
I have used a pale shimmery colour from my Wendy Hill Eye Shadow palette.

Apply a matte brown eye shadow to the crease and outer third of the eyelid.
I have used a Rimmel Eye shadow in the colour Dusk.

Apply the matte brown shadow to the outer two thirds of the lower lash line.

Apply brown gel eye liner close to lash line in a slight wing.
I have used Maybelline's Gel liner in brown.

Tight line your eye with brown gel liner. This step is optional.

Apply Mascara to top and bottom lashes. I have used Rimmel Sexy Curves Mascara.

Eyes

The completed eyes.
This is just a simple look that is quick and easy for early mornings. I hope you like this look and if you have any questions just comment and I'll answer as soon as I can.

Friday, October 19, 2012

Get to Know Me Tag

I saw this on Le Beauty Girl Blog and thought I'd give it a go.

1. Are you named after anyone?
Not really, my Aunty happens to have the same name as me but my parents just liked the name.
2. When was the last time you cried?
Last week. I always cry watching medical emergency shows, and especially One Born Every Minute.
3. Do you have any kids?
Not yet.
4. If you were another person, would you be a friend of yourself?
I don't think I would, none of my friends are like me.
5. Do you use sarcasm a lot?
I think I do but only when I think someone has asked a silly question. I.e. Did you cut your hair?
No, it just grew shorter and got a fringe by itself.
6. Will you ever bungee jump?
I'd like to think I would but I can't see myself doing it any time soon. Maybe to celebrate my 50th birthday.
7. What's your favourite cereal?
I very rarely eat breakfast, I'm not a morning person. If I had to pick one it would be porridge because it can taste different with toppings.
8. What's the first thing you notice about people?
This is a hard one maybe their eyes or smile.
9. What is your eye colour?
Blue/grey.
10. Scary movie or happy endings?
Definitely scary movies. Happy endings are generally the same.
11. Favourite smells?
I love vanilla, petrol, cat food, and cooking onions.
12. Summer or winter?
When it's summer I wish it was winter and vice versa. I much prefer the in between seasons. I burn too easily in the summer and the winter is too cold because I walk everywhere I go.
13. Computer or Television?
Computer. Anything that is on T.V. can be seen on the internet.
14. What's the furthest you have ever been from home?
Well I was born in England and I now live in New Zealand so either or.
15. Do you have any special talents?
Not really, I can push my belly out to look pregnant and move my ears but nothing special.
16. Where were you born?
Wakefield, Yorkshire, England.
17. What are your hobbies?
I love playing with make up and nail polish. I am addicted to watching YouTube videos.
18. Do you have any pets?
Yes I have an awesome cat named Tilly, she is 1 and a half years old and ginger. I had two other cats but the ran away :(
19. Favourite movie?
I don't have an all time favourite movie but I loved The Avengers. I also love The Lion King and Monsters Inc.
20. Do you have any siblings? 
Yes I have an older sister and a younger brother.
21. What do you want to be when you grow up?
I want to run my own business from home and have tonnes of children.

There's a little bit of information about me.
Try the tag for yourself.

Friday, October 12, 2012

My birthday nails

Here are my nails inspired by the dress that I plan to wear out on my birthday. Sorry if there are too many photos but I wanted to show every step. When doing my own nails I try to simplify the pattern as much as possible because I am not ambidextrous.
My inspiration.
The colours I used.
Always apply a basecoat before painting your nails.
I used OPI Nail Envy.
Two coats of Revlon Pure Pearl and one coat of Nailene Acrylic Strong Topcoat.
Make sure this is completely dry before continuing with the nail art.
After applying two stripes of OPI Red to each nail.
After applying two stripes of LA Colors Static Electricity to each nail.
After applying two stripes of LA Colors Gold Glitter to each nail.
After applying one stripe of LA Colors Silver glitter to each nail.
Finished nails with Nailene Acrylic Strong Topcoat
That is how I did my nails. Just click on the pictures to enlarge them. Any questions just ask.

Thursday, October 4, 2012

Maybelline Baby Lips Review


Cost
$3.99 on sale at New World

Product
Maybelline Baby lips in soothing cherry.
SPF 20
4g of product

Claims
8 hour moisture
in one week rejuvenated lips:
fine lines reduced
elasticity increased
suppleness increased
Centella essence increases cell turnover.

First Impressions
Feels creamy on my lips, smells nice, not over powering. I applied the Maybelline Baby Lips at 10pm it felt creamy on my lips and slightly tingly. By 3 am the product was completely gone from my lips and my lips felt dry again and still had dry skin. I will continue to use this product to see if it lives up to its claim of rejuvenated lips in one week.

Thoughts
On day two of using the baby lips, my lips feel softer they still have dry skin but it has softened. My lips feel softer even without balm on. I have been applying the balm to my lips morning and night and occasionally during the day if I feel I need it.  I don't think it provides 8 hours of moisture, my lips still get dry but not as bad as they used to. I feel it has softened my lips but not to any extreme.

Overview
This product has definitely improved the texture of my lips in one week. My lips do not get as dry as they used to but they can still get dry during the day. I don't think it provides 8 hours of moisture, I feel at most it gives 5 hours of moisture and then my lips start to feel dry and I need to reapply. This product has an SPF of 20 which will be great as we get into the summer months. Overall this is a good product that I would probably repurchase, the packaging is cute and its small size means its easy to keep with you.

Saturday, September 29, 2012

10 Products I would repurchase - September 2012

I wanted to take a break from reviewing products and thought I would do a fun post. Here are 10 products that I would repurchase if my make-up bag was stolen or destroyed. In no particular order.

1. Revlon Colorstay Foundation for combination/oily skin. My favourite foundation ever, lasts on my skin wonderfully so I don't need to use a primer and I could probably get away without a powder if I needed to.

2. Rimmel Stay Matte Pressed Powder. Keeps my skin matte all day, great for when i'm not wearing foundation but don't want to look like a greaseball.

3. Maybelline Eye Studio Lasting Drama Gel Eyeliner in the colour blackest black. Allows me to create a finished eye look with out eyeshadow.

4. Rimmel Glam Eyes Mono Eyeshadow in the colour Dusk. I use this as a brow powder, a contour and obviously sometimes as an eyeshadow. A multi use product that definitely deserves a place in this list.

5. Rimmel Sexy Curves Full Body Mascara. Great mascara, gives volume and length. Can get flaky towards the end of the day.

6. Wendy Hill Blusher Duo in Riviera. The blush is great for everyday and the bronzer allows you to warm up your skin when you need to.

7. Wendy Hill Lipstick in Au Natural. A great nude lipstick to give your makeup a finished look.

8. Rimmel Fix and Perfect Primer. Brilliant cheap primer. Reduces appearance of pores, make up last longer and makes skin feel silky. Also evens out skintone.

9. Designer Brands Lip gloss. They add a nice gloss to the lip without being too sticky and leave the lips feeling soft not dry.

10. Rimmel Stay Matte Concealer Stick. Good coverage but catches on dry skin. Great for redness if your skin is in good condition.

Those are my 10 products, some i would repurchase over others but I had to pick 10. Any questions about any of the products mentioned just leave a comment.

Wednesday, September 26, 2012

Rimmel Stay Matte Pressed Powder Review

Cost
$13 from Farmers. Marked down because of a crack in the lid.

Product
14 g of product.
I have the colour 001 Transparent

Claims
Up to five hours natural shine control with natural minerals.
Helps minimise the appearance of pores.

First Impressions
First time I applied this the powder it caught on all my peachy face hair and dry skin, I was not impressed. It did keep my shine at bay. I am someone that will get an oily glow an hour or so after applying make-up and the Rimmel powder kept me shine free for most of the day.
The packaging is a bit flimsy and the lid never really locks in place but in saying that when I dropped this product and it smashed, the lid stayed on and I was able to re press the powder.

Thoughts
Because the powder kept my face shine free all day, I decided to give it another go. I made sure to exfoliate my face well before applying the powder with a powder puff and dusting off the excess with a brush. It definitely applied better this way and reduced the look of my pores.
I have tried this product in conjunction with other products to see how it works best. I applied it over my Revlon Colorstay foundation as a setting powder. It kept my face shine free all day. I also applied this on top my Rimmel fix and perfect primer and my stay matte concealer. This gave a natural look with no shine all day.

Overview
My first attempt at using this product was not impressive, I'm not sure if maybe there was a film on top of the product that made it act the way it did or perhaps my skin wasn't in the best condition. I tried again with the powder because I had heard many good reviews of the product. I am now in love with the Rimmel Stay Matte Pressed Powder. It keeps my face shine free and my skin feels silky with it on. I apply it with a large fluffy blush on an everyday basis and with a powder puff if I'm going out and really want to minimise my pores. I feel it lives up to its claim of 5 hours shine control and can exceed 5 hours depending on the weather. I wore this powder over sunscreen when I went for a run and I was still not shiny. When used with the Rimmel fix and perfect primer I think it does minimise my pores and is overall a great product. I think I would repurchase this product and I recommend this to anyone that has issues with shiny, oily skin.

Tuesday, September 25, 2012

Dove Nutri Oil

Price
$5.69 on special from New World.

Product
40 ml of product.
Main ingredients are coconut and almond oils.

My hair
I have a natural wave to my hair and it is quite dry due to being highlighted. When my hair is left to dry naturally it is dry and frizzy and does not straighten well.
Because my hair is highlighted I have issues with greasy products in my hair. When I use some oil products it makes my natural colour darker and leaves my highlights light, which makes my hair look greasy. I do not have this problem with the Dove Nutri Oil.

Thoughts
II apply it to my damp hair then gently twist my hair in sections as it dries. This leaves me with loose curls. Once my hair is dry I add more product if it is needed. The oil is so lightweight and non greasy that you can keep applying the product if your hair gets frizzy from the weather or from sleeping on it. Using the Dove Nutri Oil serum makes my hair soft and smooth.  The oil is so light weight you can use as much or as little as you need.

Overview
I love this product. It is cheap and works extremely well. I love that it does not make my hair feel greasy and leaves my hair looking soft and healthy. I definitely recommend trying this product for yourself, it doesn't cost a lot and might change your hair for the better. Because of Dove Nutri Oil Serum I can now wear my hair down with out using heat tools on it.

Before and after photos here.

Monday, September 24, 2012

QVS individual eyelashes

Cost
$13.99 from pharmacy

Thoughts
I used these on a client and I'm not sure if its just the ones i got or they've changed the way they make them but these were really annoying to use. The glue that holds the eyelashes in place was too far down the eyelash so if I grabbed it near the root, the lashes would stick to my tweezers and not to the eye. If i grabbed the lashes were there was no glue I would only grab 1 lash and it would unravel the join. I have used these lashes before and they have worked perfectly well. I might have to purchase them again to see if its a one off thing. The glue they come with works perfectly well so no need to go out and purchase glue separately. They last well on the eye and give a more natural look than strip lashes. Individual lashes in general can be hard to apply on your self but with patience and practice it can be done.

Sunday, September 23, 2012

Saturday, September 22, 2012

Artiste Brush Cleaner

Cost
$20.49 from Farmers minus $20 loyalty voucher.

Thoughts
Works well, I use about 2 sprays per brush depending on size or product on brush. I also used this to sanitise my lipsticks and it worked well.
I quite like the scent of the product as it lessens the smell of the alcohol, but the fragrance does stay on my brushes, so if this is something you wouldn't like I suggest not buying this product. I think it smells like vanilla.
The listed ingredients are Isopropyl Alcohol and fragrance. I can buy a litre of Isopropyl Alcohol for $18 from http://www.beautygallery.co.nz when this is $20.49 for 100ml. So I would probably not repurchase this, but since it was only 49 cents after my voucher, I am glad I got it.

Overview
This product does what it says, and leaves a scent on the brushes. It works but is extremely overpriced so I will not be purchasing this product again.

Don't hesitate to ask any questions,
Frankie.

LA Colors

Cost
3 for $10 from the Warehouse usually $5 each.

Lip liners
I am currently trying out the LA Colors Auto lip liner in Fiery Red and so far so good. I am using it with my LA colors red lipstick which when worn alone usually bleeds at the edges of my lips. I lined my lips with the pencil then lightly smudged the colour onto the rest of my lips before applying the lipstick. Was much easier to get a clean line with the pencil rather than the lipstick.
I wore this lip combo for a total of 5 hours before I took it off. It hadn't bled and it felt creamy on my lips. It did not stain my lips when I took it off with my makeup wipe.
I did think the colour was a little bit darker than I wouldve liked, but overall good.

I applied the nude lip liner with a wendy hill au naturel lipstick on top and then a sheer pink gloss over top. I do not like the colour of this lipliner on my skintone but with the lipstick and gloss over top its ok. I wore the lip combo for about 3 hours and it only came off when I ate. The colour is not as obvious as the red but from what i can tell it didn't bleed.

I like the staying power of the lip liners, they definately extend the wear of my lipsticks and prevent bleeding. Only down side for me was the colour but thats a personal preference.


Loose Eye shadow
The Loose Eye shadow in Snow White worked well as a highlight on my skin tone. The colour is sheer and very sparkly. It comes with a brush which is OK for placing the shadow as a highlight but it needs to be blended with a fluffy brush. I don't think the brush is very good for the eyelid but it could be used if there is no alternative.

Final Thoughts
These products definitely exceeded my expectations for $5 each they do a good job. I am sure you could find better products but for the price these can't be beaten. I would repurchase these products.

Hope this was useful, if you have any questions don't hesitate to ask.
Frankie.

Thursday, September 20, 2012

Coming soon

I just bought a few products today, so expect to see reviews of some, maybe all of these;
Artiste Brush cleaner spray - basically just isopropyl alcohol with fragrance but I got it with loyalty points so that's OK.
Rimmel Stay Matte pressed powder in 001 Translucent.
QVS individual lashes. I have tried these before and I like them.
LA colors shimmering loose eye-shadow in Snow White.
LA colors auto lip liner in Fiery Red and also in Nude.
If your hanging out for any of these to be reviewed, just leave a comment below and I'll post that one first.

Frankie.

Wednesday, September 19, 2012

Nails

Here are a few of the nail designs I have done in the past year or so. Please excuse the poor quality photos, most were taken with my phone.
These are acrylic nails I did on myself. The have a gel topcoat and nail art on the ring finger. They are small purple beads with a flower.
Here are my friends nails, again with acrylic, although with a purple glitter tip. I mixed purple glitter with a clear acrylic powder before mixing with the monomer and applying to the nail.
Another friends nails, this time gels. The glitter was applied before the gel topcoat as well as the pink and blue rhinestones.

Here are my mother's nails with a subtle pink water marble with regular nail polish.
My own nails again, this time with a retro looking design that I absolutely love.
My nails again.... This is bluesky shellac with a glitter on top.
These are my sister's nails, there are two pictures because I think they are awesome. They are my version of a galaxy nails, done using Bluesky shellac over a gel nail overlay.

Any questions, don't hesitate to ask.
Frankie.

Let's start with hello

Hello everyone!!! I'm Frankie and I'm making this blog just for the fun of it and to give me somewhere to put all my thoughts and ideas.

Firstly a little bit about myself. I am a beauty therapist, I am weeks away from finishing my final year of school and looking forward to getting into the beauty industry full time.
My first passion is nails and more specifically nail art. This is how I first got into studying beauty therapy. But from day one of my diploma I realised there was a lot more to beauty therapy than I thought. To be honest, I went into it thinking it was something I wouldn't have to think about, something that would be fun and girly. Don't get me wrong it really is fun and girly but the depth that we go into on the science side of things. Its definitely not rocket science but it wasn't far from the level of biology I studied in a pre nursing course I did. Just putting it out there, not all beauticians are bimbos :) Though there are a few orange faced barbies out there.

Anyway, rant over. I'm planning to post a little of everything on here. Make-up, nails, anything beauty related. There may be reviews or tutorials, we'll see as it develops.

Thanks for stopping by,
Frankie