It has been a very long time since I last posted, and I don't even have an excuse as to why. Although I have not been writing blog posts, I have been uploading a nail related video to my YouTube Channel once a week for a little while. If you are interested I aim to upload a nail art video every Wednesday at 6pm New Zealand time, with occasional swatch videos or other nail related videos as bonus videos, although if I am low on the nail art videos I may rearrange this schedule.
Anyway, enough about YouTube. I haven't a whole lot else to update, I am still solely working for my self in my beauty business mainly focusing on nails and nail art, business has steadily been getting busier since November last year and I am really enjoying getting to know all my new regulars as well as seeing those that have been to see me since near the beginning.
I hope to continue growing my business, but I am unsure whether I will be staying in Hamilton forever or moving on to somewhere new sooner or later. I am certain I want to continue making YouTube videos, because I find it fun and hopefully someone, somewhere can learn something from my videos.
I think that is enough updates for now, I hope to be posting more regularly on here, perhaps when I have created a design I love on a client but was unable to record a video on said design, who knows, we will see what happens.
Here are a few nail pictures to make this post a little more interesting.
Neon Galaxy Nails - Tutorial for this design will be on YouTube in the near future.
Pink and Purple Gradient Chevron - Not my original design, client brought in a picture but I didn't catch the artists name. Let me know if you know who it was.
All of these techniques can be varied by using different polish colours and glitter colours. You can choose to use the same colour polish and glitter or use a different coloured polish and glitter. This looks especially good with method 1 using your manicure colour as the base polish and adding a gold or silver on top. Also with method 2 a black base and silver glitter look nice together. I think I also need to add that the photos do these nails no justice, it is so difficult to get a good shot of glitter.
Sheer Gel Polish Glitter Nail
1. Sheer Glitter Nail
For this method start by applying your basecoat and two coats of colour polish curing between layers, if your colour is not opaque apply more layers. On a palette place a drop of top or base coat and add loose glitter of your desired colour and mix together. Then apply this mixture to the nail, I like to use a dabbing method as it gives more even coverage. Then cure the glitter layer. You can stop here and apply top coat or you can add another layer of the glitter mixture if you want more glitter. Once you have applied your final top coat check to make sure there are no rough areas, if there are then buff the nail and apply another layer of top coat.
Medium Coverage Gel Polish Glitter Nail
2. Medium Coverage Glitter Nail
For this method you want to start the same way as the first method, apply your basecoat and 2 colour coats curing between layers. Get your glitter on a fluffy brush and press the glitter into the sticky inhibition layer. Then cure in your lamp. Now gently dust off ant loose glitter and apply a top coat. Remove the sticky layer and buff the nail before applying a final top coat.
Full Coverage Gel Polish Glitter Nail
3. Full Coverage Glitter Nail
For this method apply your base coat and one coat of colour polish and cure between layers. Next add a second coat of colour but before curing pour on your glitter until it covers the whole nail, shake off any excess and cure in you lamp. Now brush off any loose glitter, apply a top coat and cure. Next remove the sticky layer and buff the nail before applying a final top coat.
Gel Polish Glitter Nails are so easy to do and add such a great accent to any manicure. The colour combinations are endless. I hope these steps made sense, if anyone would like me to elaborate or make a video tutorial please let me know.
Benefit Hello Flawless Oxygen Wow Foundation in Ivory - Before and After
I filmed a little GRWM video on this make up look and I though for my blog I would do some mini reviews of the products I used.
Starting with the foundation I used Benefit Hello Flawless Oxygen Wow Foundation in Ivory. This foundation has more of a dewy finish than the Estee Lauder Double Wear Light Foundation. It also has less coverage and this colour is quite yellow, but because it isn't full coverage it doesn't end up looking too yellow on my skin. I like the finish that this gives to my skin but it doesn't last very well with my oily skin. It is definitely a foundation that needs powder.
Under my eyes I used the Maybelline Fit Me Concealer in fair. This concealer is ok. The colour isn't perfect for me, it is quite pink toned and light so if I use too much I look a little crazy. I also find it settles into the creases under my eyes.
I used Estee Lauder Double Wear Concealer in 1C light to conceal my many blemishes. I really like this concealer, it covers well, lasts really long on my skin. If I'm being lazy and don't want to wear foundation I will use this alone. The colour matches my skin really well.
For powder I used the Rimmel Clear Complexion Powder in Translucent. I picked this powder up while I was in the UK. I haven't really used it long enough to have a clear opinion on it but it does the job. I can't say it has wowed me but it also hasn't disappointed.
I used the Rimmel Natural Bronzer in Sun Bronze to bronze up my skin. This is really great pale girl bronzer, its not too pigmented so you can build up the colour instead of going in too strong. Its also a great colour, not too orange and according to the packaging it is waterproof. It also has quite a perfumed smell which I can't say I'm too fond of and I was a little worried the fragrance might break me out, so far it has not. I also used this as eyeshadow in my crease.
On my cheeks I used the Top Shop Cheek and Eye Duo in Bitten Cherry. This is very pigmented and dark. After watching back the video and looking at the pictures I think this is too dark for my pale skin on an everyday look. It would be great for a dark vampy look. I also think I applied it too low down on my cheeks, so that doesn't help. It is a really great colour and I can see it being a lovely eyeshadow.
I used Nars Albatross for my highlight and also as an eyeshadow. I love this product, it is so beautiful. I do think it is possibly a little too much for everyday on my fair skin because it has a very gold reflect and I think something more champagne or peach looks more natural on my skin for everyday. I absolutely love this as an eyeshadow as well.
On my brows I used the Jordana Eyeliner in Taupe. I have used this a long time, it gives a great natural looking brow that is not too warm toned. Also can't go wrong with the price.
For eyeliner I used the Nutrimetics Defining Waterproof Eyeliner in Mahogany. I don't love this product but its not bad. I like that is retractable so I don't have to worry about sharpening, it doesn't smudge or transfer throughout the day. Its not a bad eyeliner but I just don't love it for some reason.
I used a sample of the Estee Lauder Sumptuous Extreme Mascara in Extreme Black. This is an ok mascara. Defiinitely looks better when I curl my lashes, but most mascaras do. It added length and thickness and doesn't smudge through out the day. Overall a good mascara but I don't think its really any better tan a lot of cheaper mascaras I have used.
Finally on my lips I used the Rimmel Provocalips in I'll Call You. The colour is a great muted hot pink, very wearable everyday. The product is good too. Easy to apply, lasts well. It does end up peeling off at the end of the day and does wear off a little in the inner rim from eating. I like to carry a tinted lip balm product with me so if it starts to wear off in the inner rim or is getting a bit dry, I can apply the balm. The tinted colour of a balm helps to blend the apocalips colour with your nude lip colour so it isn't such a stark difference.
Overall most of these products I would recommend. I can't really bash any of the products I used in this GRWM. My favourite product would probably be the Nar Albatross, because it is so pretty and shimmery I could stare at it all day. My least favourite product is the Maybelline Fit Me Concealer just because I think the colour I have is a little off on me and it does crease a little.
Today's nails were inspired by a picture that my client brought in with her, but I can't remember where the photo was from. If you know where this design originated, let me know so I can give credit to the right person.
For this manicure I mixed up a pale blue gel polish colour by mixing a royal blue with a white.
For the ring finger I painted a few coats of white gel polish until the colour was opaque, then I free hand painted the horizontal stripes one at a time curing after each stripe. I chose to cure the stripes individually so that I could get cleaner lines. Although this method is much more time consuming I find that I get better results than when I do all of the stripes at once. The stripe got thinner as they got closer to the cuticle.
For the anchor I free hand painted the stick with cross and the curved bottom and then cured before adding the triangles and a small dot for the top. Finally I added another smaller dot in white to make the whole where the anchor would attach to a chain. The design was then finished with a top coat.
For the thumb we did an opaque silver glitter nail.
I hope you like this manicure, if anyone would like me to recreate this manicure in a step by step video just let me know.
I would just like to be fair to this product and mention that my hair is extremely dry at the moment because I spent a lot of time in chlorinated water over the weekend, so it is soaking up moisture like crazy.
I will do a little comparison between this and the only other hair serum I've used the Dove Nutri Oil Serum which I reviewed here and before and after photos here.
This serum is a little bit thicker and more gel like. It also is a little bit heavier on my hair and I feel I have to use less to get rid of frizz. I also notice that it takes awhile to absorb in unlike the Dove which is almost instantly absorbed. If I apply a little too much of the serum, it will absorb over night and leave my hair silky the next day.
This serum has a much stronger smell than the Dove which has barely any scent. This serum smells very strongly of Ginger which I guess is because it is one of the main ingredients. You can smell it on your hair.
I think that I prefer this Serum slightly more over the Dove because it is slightly heavier and for my dry hair I feel it does more to repair my hair than the Dove does. I do still like the Dove and if you have already quite good hair and just a few flyaways to tame I would definitely recommend the Dove over this Serum.
If I know I am going to wash my hair the next day or in the evening I will apply a generous amount of the Serum to the length of my hair and braid it, then leave it in throughout the day or overnight. Then when I wash my hair it is nice and healthy.
Because I find this product does absorb into your hair, you don't get a build up of product. On second day hair I will sometimes add an additional pump to smooth any frizz that has appeared over night.
The first photo is my hair air dried overnight and brushed through, the second photo is my hair with two pumps of the serum which is normally enough for my hair but today my hair was so dry I used a third pump which is my hair in the last picture.
Excuse my really bad roots but I am trying to grow out my natural colour.
Happy Valentines Day everyone! Today's post is going to be a really quick one because I have been working all day and I haven't had a lot of time to sit down and think of a good idea for a post.
Here are a set of nails I did the other day. My client brought in a picture of this design in different colours and asked me to recreate it. I do not know who did the original design so I can't link to it.
She chose pink, purple and black and also asked me to add the purple hearts and pink stars to the design. We reversed the colours on the thumbs.
Long time, no blog. Feels like I start every post with something along those lines and a promise to post more frequently from now on. No such promise this time, I will do the best I can to post more often but I will most likely fail to do so.
The upside to being absent for so long, I have plenty of photos of nail designs that I can now share with you. Instead of lumping them all together in one post, as I have done previously, I thought I would give more detailed explanations of each design in their own separate posts.
This first design is using three polishes, a white (Orly White Out), a minty green (Orly Gumdrop, is slightly more minty in person) and an optional glitter polish I used Wasabi. I can't remember the brand name of the glitter polish, but if anyone needs to know I can search it out for you.
I start with basecoat as always then apply a few coats of Orly Gumdrop, you can use any colour you prefer. Then using the white polish draw to semi circle shapes at the tip of the nail overlapping in the centre, creating the heart or lip french. This shape of french is very easy to do because the brush does most of the work for you. You may need to do two coats of the white if the colour underneath is showing through. You could stop here if you want to, but I chose to continue and using a dotting tool and the same white polish I added a few white dots along the line of the heart tip.
You may see in the photo I added a few rhinestones, which you may like to do also, although I prefer the design with out. At the time of this manicure I had on some very grown out acrylics which I was being lazy about removing so I added the rhinestones to disguise the acrylic nail which was most obvious on my ring finger.
I know that was a very rambly explanation, so if you have any questions do not hesitate to ask.
I did this make up for work, it is quite natural, but a little different with a bit of purple thrown in there.
I forgot to take a before photo but if you watch the video you can see my beautiful no make up face.
I started off with the Designer Brands moisturising primer because a few of my spots were a little dry and this primer helps to stop my foundation clinging to them.
Next I applied Revlon Colorstay Foundation in Buff using the Real Techniques Buffing Brush.
I then sprayed my face with the Australis Make Up finishing spray and buffed it into my foundation a bit to make sure my foundation was blended well.
Next I applied a pale shimmery pink to my eyelid and then a bright purple shadow into my crease and outer V, I then blended it. I also applied a small amount of the pink to my brow bone. And defined my lower lash line by applying the purple to the outer corner of the lower lashes.
I then did a thin, slightly winged liner with my Maybelline liner.
I drew in my eyebrows using the Rimmel Eyeshadow in Dusk and then set them with the L.A. Colors clear mascara.
I set my foundation with the Rimmel Saty Matte Powder in Transparent.
I contoured with the L.A. Colors pressed powder in Cocoa.
I applied a pale pink blush to my cheeks and highlighted my cheeks with a skintone shimmery shadow.
On my lips I am wearing L.A. Colors auto liner in Nude and Wendy Hill Lipstick in Au Naturel, as well as a little bit of a nude Models Prefer Lip gloss.
Here is the video, if you want to watch me ramble on whilst I apply my make up.
Today I am reviewing the Rimmel London Glam'eyes Mono Eyeshadow in the colour 033 Dusk. I use this mainly as a brow powder.
You get 2.4 grams of product in this eyeshadow and it also comes with a sponge applicator which is actually not that bad. It has a thin end and a fat end, if I am in a rush I occasionally use the thin end to fill in my brows.
Before and After Natural Brow
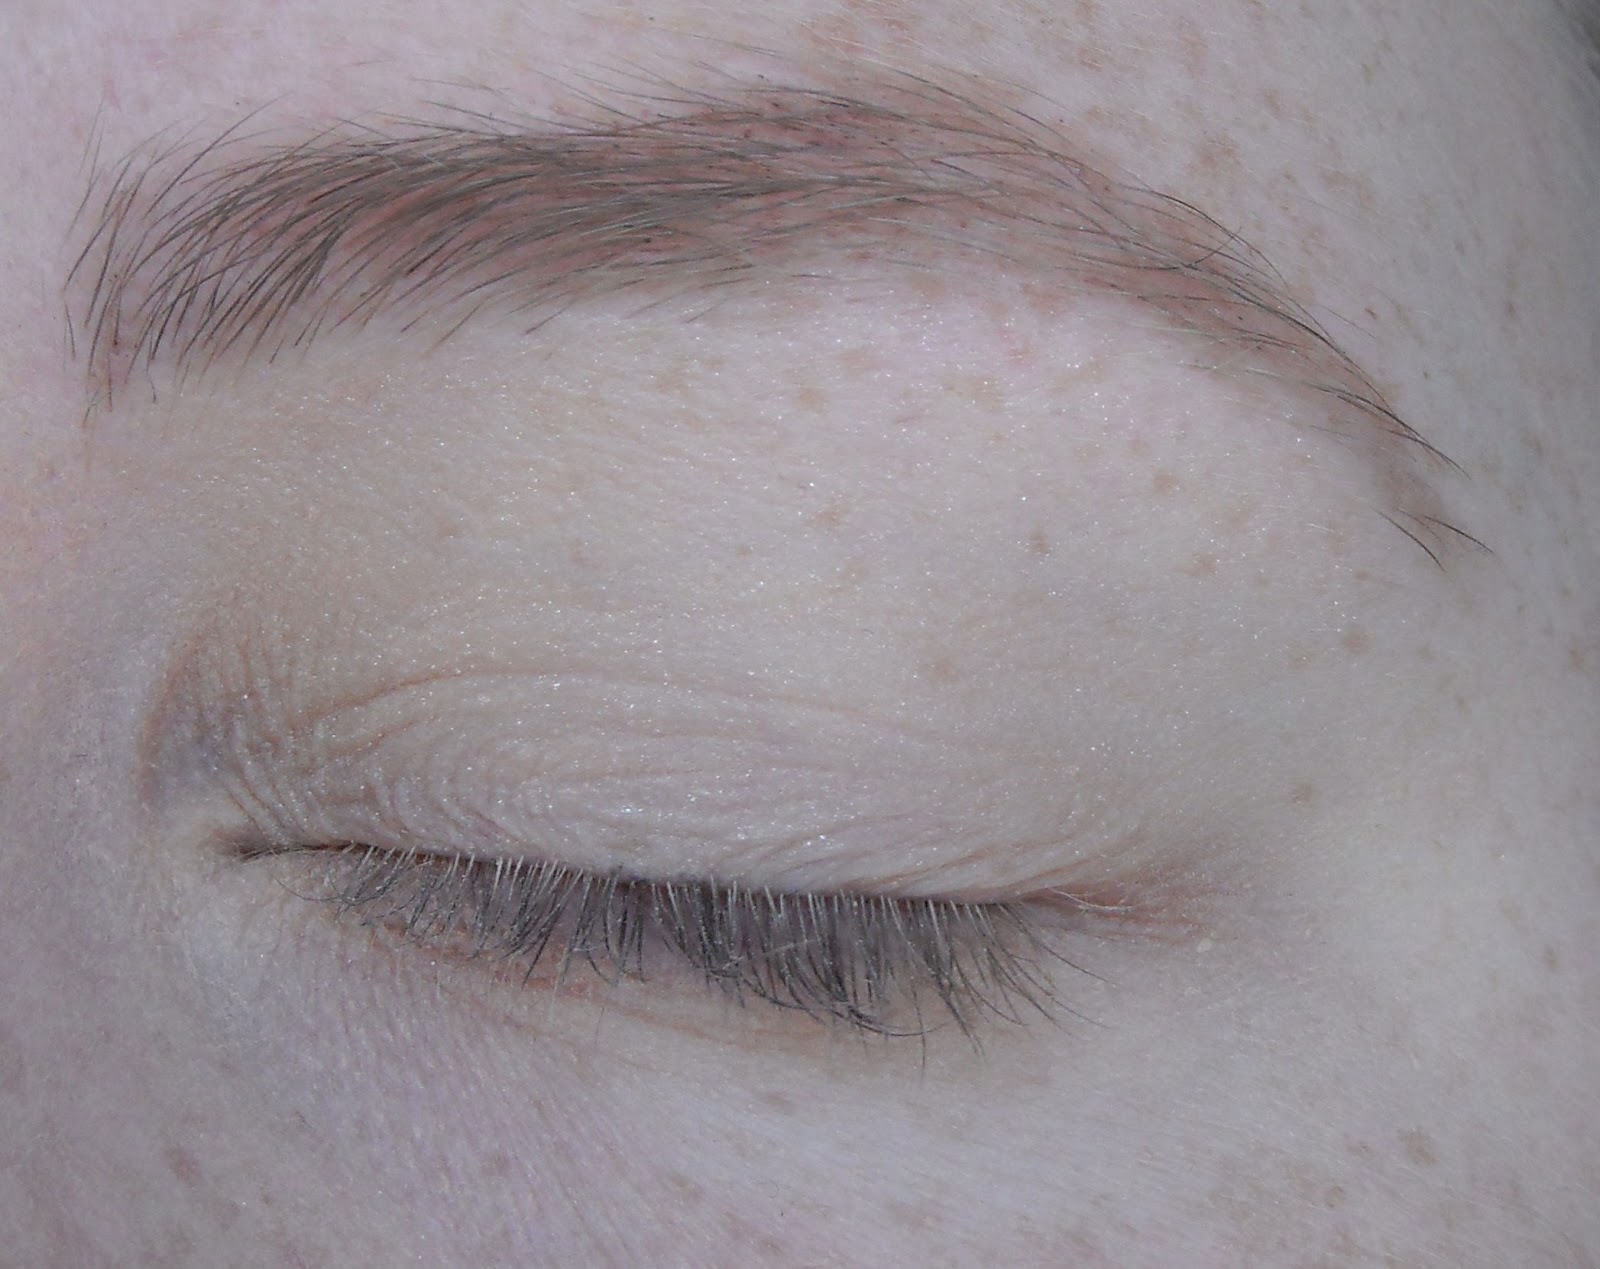
In the top photo, the left brow has been filled in and the right has not. I think it gives quite a natural not over drawn look. Most of the time I set my brows with the LA Colors Clear Mascara and my eyebrows last all day. Even when I use the eyeshadow alone I have no issues with my brows disappearing through out the day.
In the second photo is my Rimmel Eyeshadow in Dusk and the angled brush I use to fill in my brows. I have been using this powder almost every day for at least a year, if not longer, and as you can see, I have barely made a dent in it.
033 Dusk Swatch
On the right is a swatch of the eyeshadow on my hand.
It is quite pigmented.
Dusk on the lids
On the left is the eyeshadow on my eyes. I have applied the shadow on my lid then blended it into the crease in a winged shape. I have also applied a little under the eye, then liner, mascara and inner corner highlight.
This is an easy way to do a daytime smokey eye. It adds definition to your eyes without making it look like you tried too hard.
This is a great versatile eyeshadow. It can be used all over the lid, just around the lash line or in the crease and best of all because it is matte it can be used as a brow powder. I find it good as a brow powder because I can build up the colour, keeping them more natural for the day time or darkening my brows for a more dramatic eye look.
I just wanted to update with a before and after photo for the Revlon ColorStay foundation.
In the first photo I am wearing nothing but moisturiser.
In the second photo I am wearing Revlon ColorStay foundation in 150 Buff applied with a Real Techniques buffing Brush. You can see it has covered all the redness in my skin.
The third photo is my Revlon ColorStay and Buffing Brush.
The final photo is my completed makeup. I have not used any concealer only contour, blush. highlight and my Maybelline Dream Matte Powder.
I wanted to have a play with makeup today but I already had my basic day makeup on. Just face makeup, mascara and eyebrows. So I thought I thought I would have a play with eyes.
I wanted to give silver makeup a go because I have never really worn a silver eye before. Looking through my collection I noticed my only silver makeup was from quite inexpensive brands, so I decided I would try to make an inexpensive eye look.
What I did
I started with my Jordana Quickliner in 05 Silver Lining and put this all over my lid and under eye blending out the edges with a cotton bud.
I then applied LA Colors Shimmering Loose Eyeshadow in SE11 Snow White everywhere I had applied the silver liner and blending the remaining product on my brush up to my eyebrow as a highlight. This worked well because it is a sheer white shimmery shadow that looks silver over the liner and just acts as a highlight over bare skin.
Next I lined my tightline and waterline with LA Colors Eyeliner Pencil in P602 Brown-Black, then also lined my upper and lower lash line before smudging the liner into a winged shape with a cotton bud.
I then applied more of the Snow White shadow over the liner to blend it all together.
I then reapplied my current mascara, Revlon Growluscious.
I thought this eye look would be good to keep in mind for times when you are caught with out your full makeup collection. Perhaps you are staying with someone and have only brought face makeup and mascara. This is really quick and easy and looks great with just lip gloss or a glossy lip balm.
This is a follow up post to my review of Dove Nutri Oil which you can read here. At the time I didn't take any photos for you to see the difference. I can tell you that I like the product, but I thought I would let you make up your own mind by seeing my before and after photos.
I know the colour and angle of the photos are different but I had a hard time getting them to look similar, I hope you can still see the difference.
Before and After
In the first photo I have shampooed and conditioned my hair and then let it air dry with no styling products. I have also pinned my hair in the position I want it to dry in. My hair is frizziest in my top layers where the hair is shorter so has less weight and it has also been highlighted more often.
I start by squirting two pumps of the oil into my hands and spreading it all over my hands then i rub it through my hair avoiding the roots. Then if I need to I will apply more one pump at a time. I used about four pumps today as the weather is quite humid. When I am finished I will use what ever is left on my hands to smooth down any frizzies near my roots.
This oil is so lightweight that I can apply as much as I want. If my hair is being particularly unruly I will reapply the oil throughout the day when I need to and it does not get greasy.
I highly recommend you try this product, its inexpensive and works well.
I love doing nail art and I recently lost my nail art guinea pig to overseas travel, so I have been suffering a little bit of nail art withdrawal. I have been spending a lot of time watching nail art videos on YouTube.
I struggle to do nice nail art on my self because it is near impossible to get both hands looking the same quality. As I mentioned in a previous post, I am definitely not ambidextrous. I stumble upon the temporary tattoo technique whilst watching YouTube videos, it basically involves painting your nails, sticking a tattoo on top then sealing with a top coat. Great for getting both hands to look good.
Here are some pictures showing how I did my temporary tattoo nail art.
Start with freshly manicured nails.
I filed my nails, gently pushed back my cuticles and applied cuticle oil.
Make sure you remove the cuticle oil by washing your hands before applying polish.
Always apply a base coat to prevent staining your nails.
I used OPI Nail Envy.
You need to apply a base colour of your choice.
I chose OPI Fly and applied two coats.
Make sure the colour is completely dry before starting with the tattoos.
These are the tattoos I used. They cost $1.
I cut shapes out of the tattoos that I wanted on my nails.
I applied it by placing the tattoo on to my nail then pressing a damp cotton pad on top for 10 seconds.
Thumb with star tattoo applied.
Finished nails with two coats of Nailene Acrylic Strong Top Coat.
I hope you enjoyed my nail art, you can recreate this in your favourite colour and with any tattoos you can find. Remember you can also cut up the tattoos like I did if they are too big for your nails.
Here is how I do my eyes most days. Occassionaly I will apply a gold shadow to the lid.
Start with a clean eye.
Fill in your brows if you need to.
I have used a Za eyebrow pencil.
Apply a shimmery skin tone shadow to the entire eyelid up to the brow.
I have used a pale shimmery colour from my Wendy Hill Eye Shadow palette.
Apply a matte brown eye shadow to the crease and outer third of the eyelid.
I have used a Rimmel Eye shadow in the colour Dusk.
Apply the matte brown shadow to the outer two thirds of the lower lash line.
Apply brown gel eye liner close to lash line in a slight wing.
I have used Maybelline's Gel liner in brown.
Tight line your eye with brown gel liner. This step is optional.
Apply Mascara to top and bottom lashes. I have used Rimmel Sexy Curves Mascara.
Eyes
The completed eyes.
This is just a simple look that is quick and easy for early mornings. I hope you like this look and if you have any questions just comment and I'll answer as soon as I can.
Here are my nails inspired by the dress that I plan to wear out on my birthday. Sorry if there are too many photos but I wanted to show every step. When doing my own nails I try to simplify the pattern as much as possible because I am not ambidextrous.
My inspiration.
The colours I used.
Always apply a basecoat before painting your nails. I used OPI Nail Envy.
Two coats of Revlon Pure Pearl and one coat of Nailene Acrylic Strong Topcoat. Make sure this is completely dry before continuing with the nail art.
After applying two stripes of OPI Red to each nail.
After applying two stripes of LA Colors Static Electricity to each nail.
After applying two stripes of LA Colors Gold Glitter to each nail.
After applying one stripe of LA Colors Silver glitter to each nail.
Finished nails with Nailene Acrylic Strong Topcoat
That is how I did my nails. Just click on the pictures to enlarge them. Any questions just ask.